
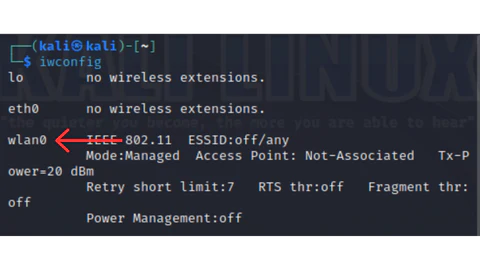
After installing the driver, if the iwconfig command still shows ‘No wireless extensions,’ follow this guide to resolve the issue.
Make sure you have downloaded the latest version of VirtualBox HERE
You can download the VirtualBox Kali Linux image HERE
STEP 1: Plug your AWUS036ACM into your computer.

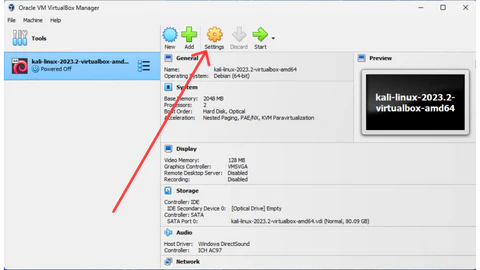
STEP 2: Open the Virtual Box application and then open the settings.
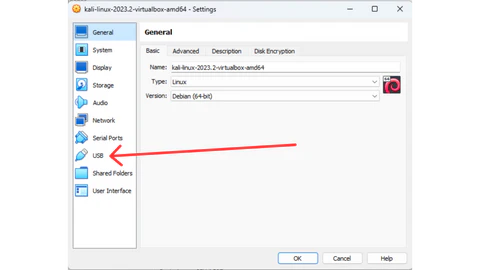
STEP 3: Click the USB option.
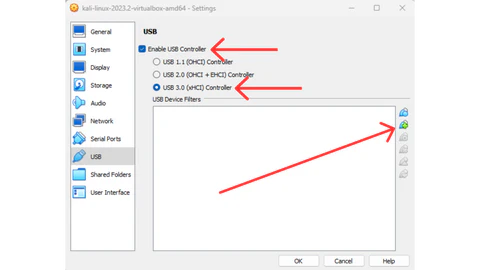
STEP 4: Enable USB Controller, select USB 3.0 (xHCI) Controller, and click the add USB filter icon.
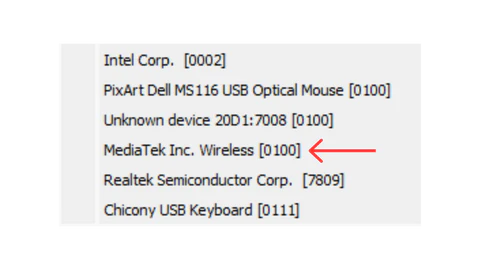
STEP 5: Select “MediaTek Inc. Wireless” as a USB filter.
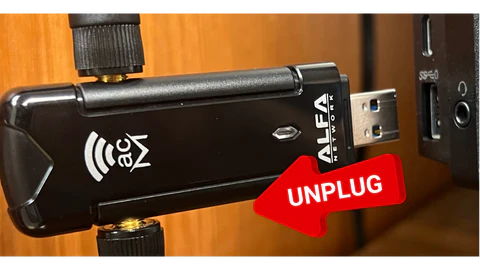
STEP 6: Click OK and then Unplug your AWUS036ACM from your computer.
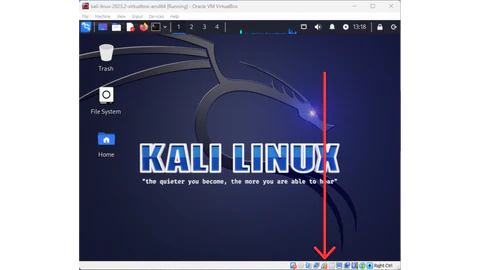
STEP 7: Start your Virtual Box Kali Linux VM and login to Kali Linux.
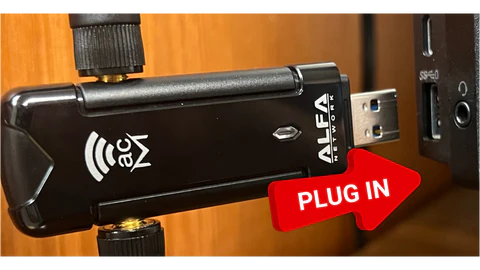
STEP 8: Plug the AWUS036ACM back into your computer.
STEP 9: If successful the USB filter icon will have a red dot on it and the LED on the AWUS036ACM will not light up.
STEP 10: You can also confirm Kali Linux is seeing your Wi-Fi USB adapter by opening terminal and typing “ifconfig” or “iwconfig”.
Note – Virtual Box can be temperamental with USB passthrough at times. If Virtual Box is still not recognizing the Wi-Fi USB adapter you may need to unplug it, close out / shutdown the VM, start up the VM again then login, and then plug the Wi-Fi USB adapter back into the computer.